
Select Color
Apply Color
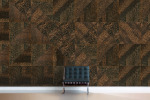
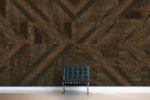
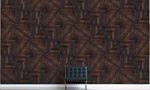
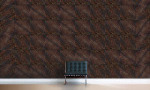
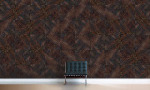
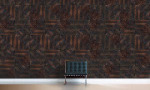
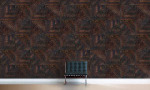
Select Pattern
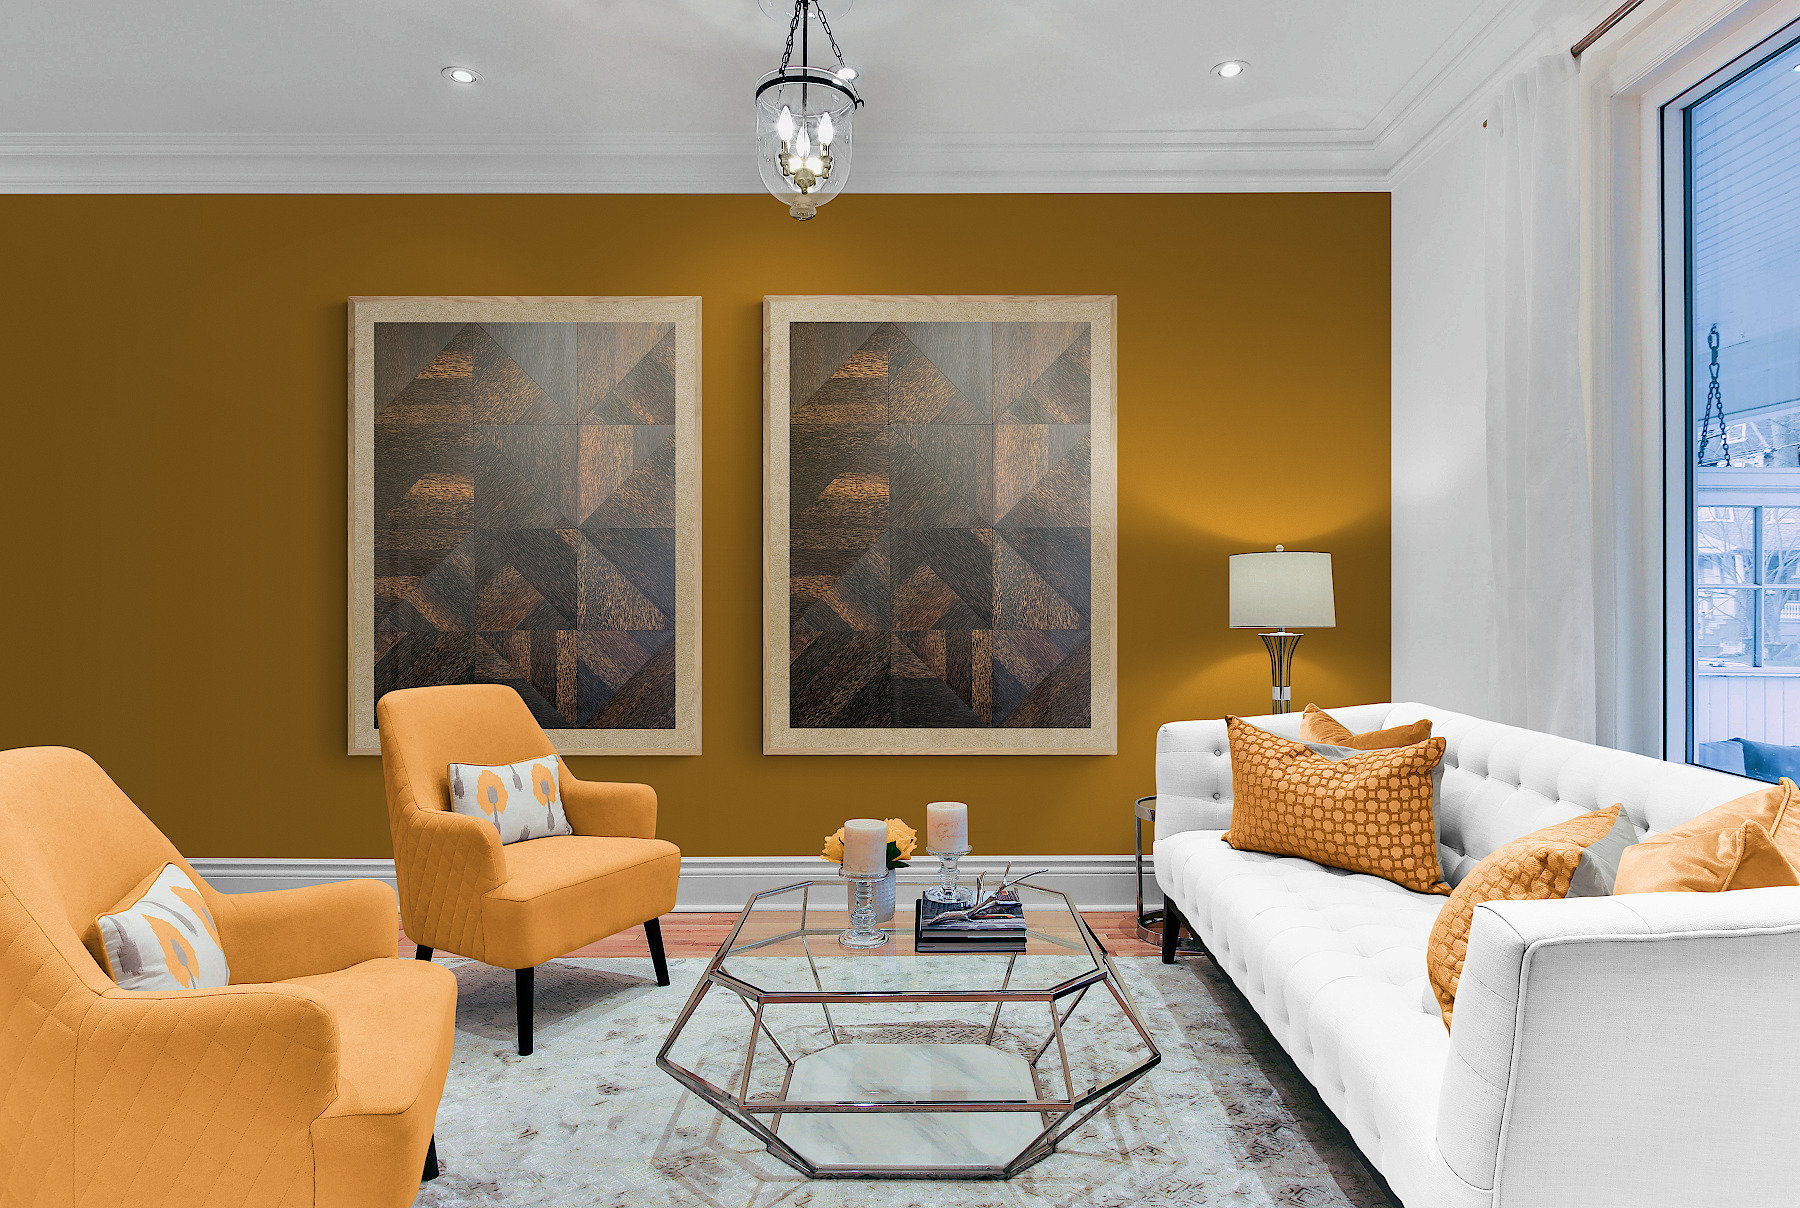
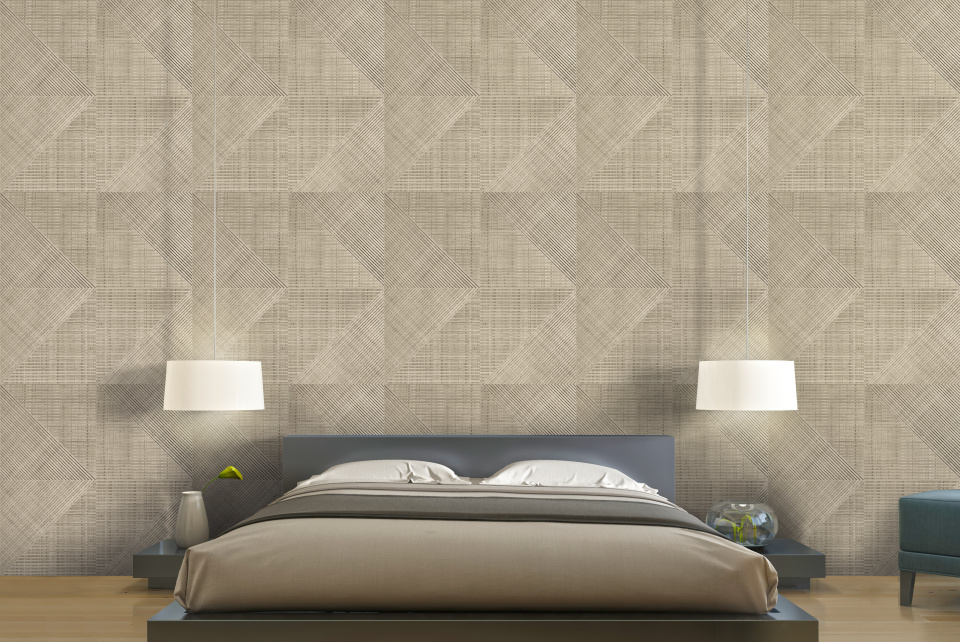
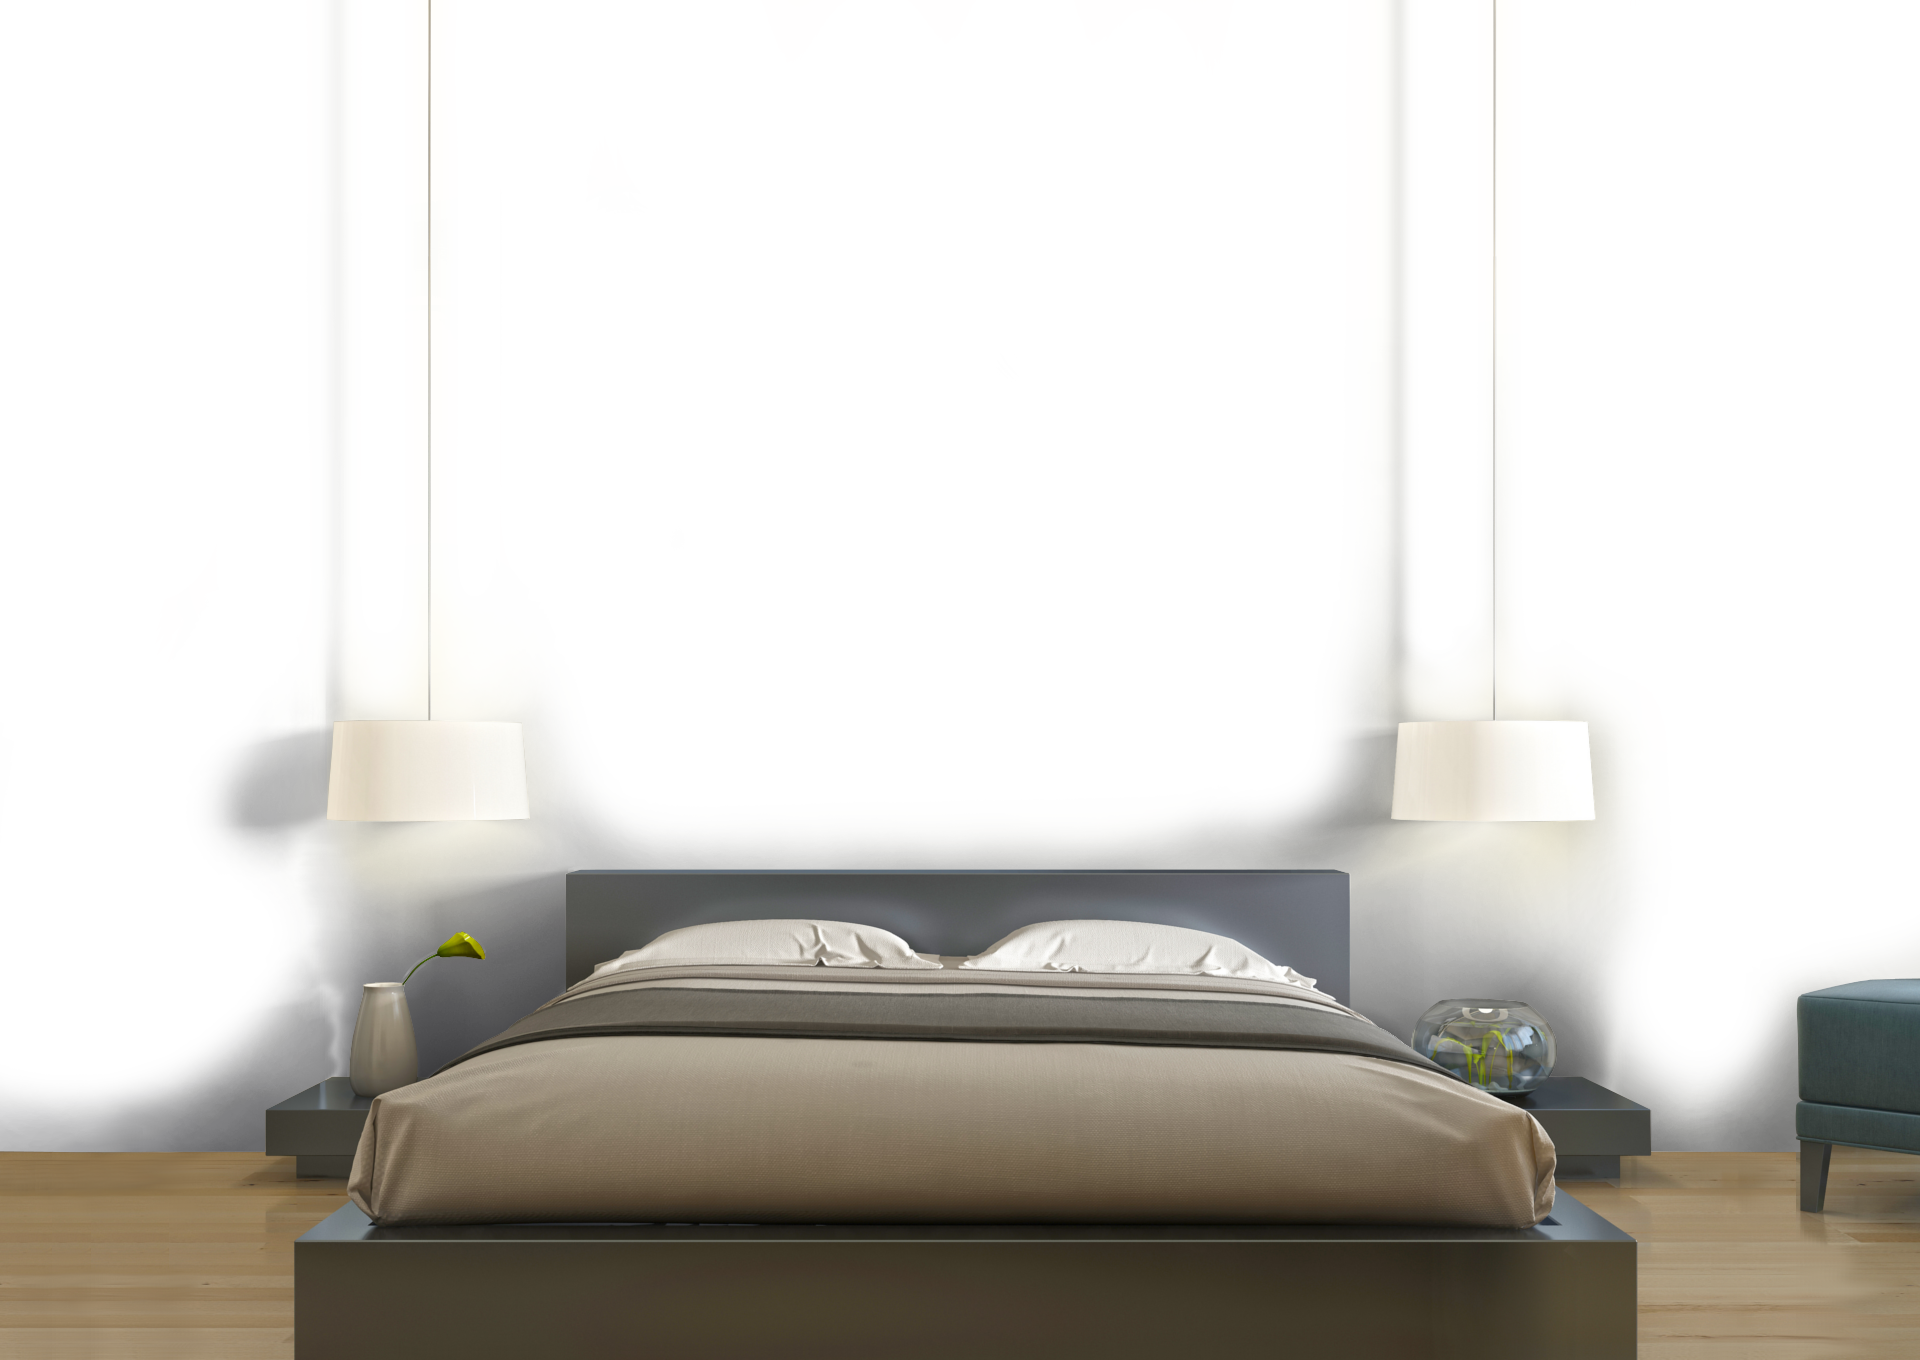
Select Room


Print your design:
Please be sure your print settings are set to show background images and that the pages are in Landscape orientation.
Share your design as a link:
Click to select the url and copy or bookmark this page to save your design.
Share on Pinterest:
To share your design on pinterest you will need to take a screenshot and save the image to your computer. Then on Pinterest, click the "+" button in the lower right and select "Upload a Pin".

Request Fractal Panel Samples:
Request Quote:
Congratulations!
Your design has been submitted to the contest.


You will need:
 0 X Panels
 0 Y Panels
 0 W Panels
 0 Z Panels
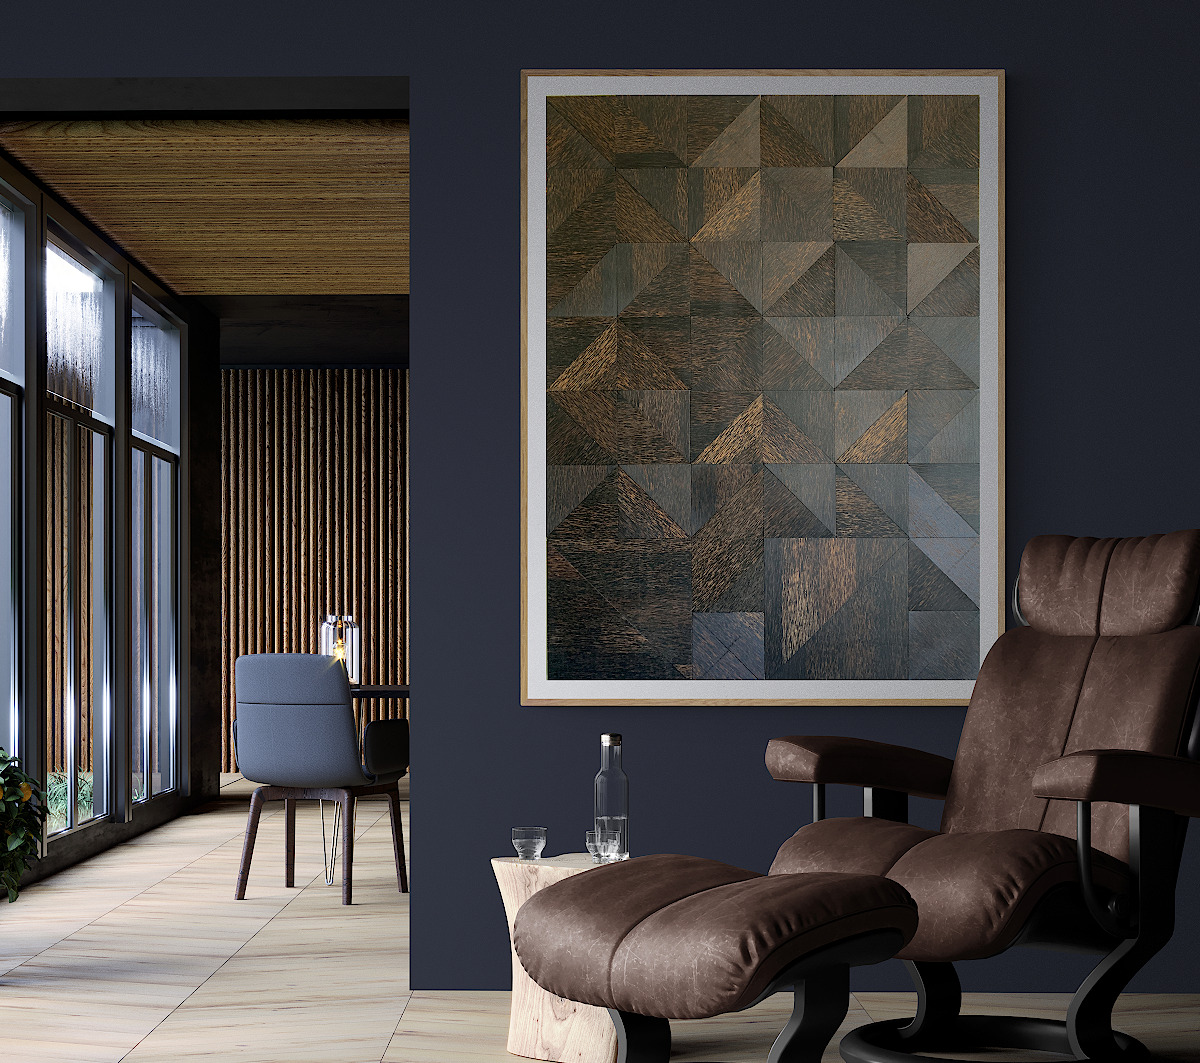
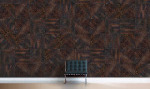
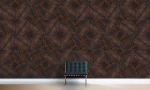
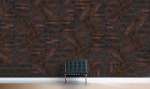
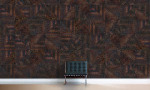
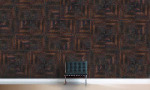
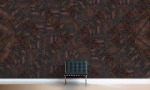
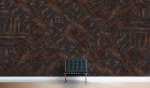
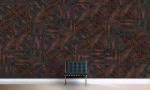
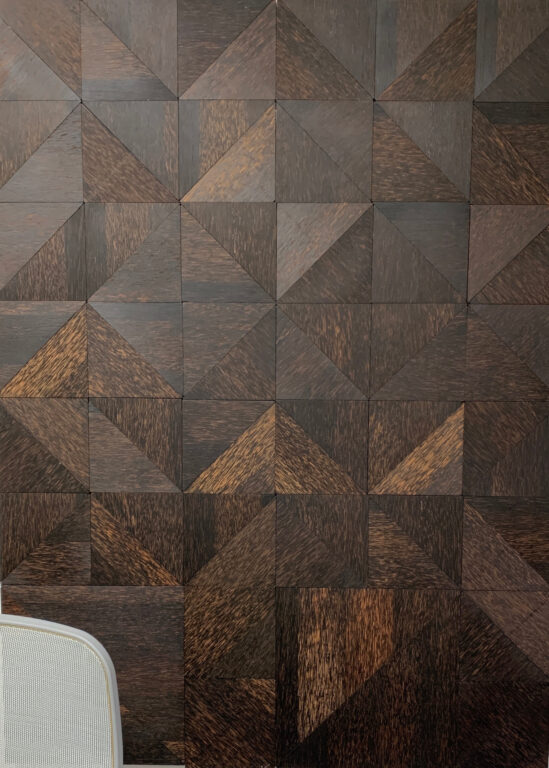
About PalmTheory™
PalmTheory™ by Smith&Fong applies the use of compositional geometric figures, each part of which has the same proportional character as the whole. Exciting and interpretive this expressive panel series uses the discipline of isosceles triangles to create squares and nested geometric shapes that express infinite space by emphasizing line, color and light. The visual complexity of the PalmTheory™ compositions causes the eye to find forms beyond the geometry evoking ideas, events and emotions.
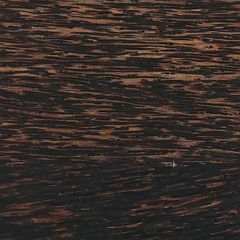
Available in natural colors as well as oiled Greige, Fog and Noir finishes to name a few, the PalmTheory™ line has a palette to enhance any project.
Manufactured by Smith&Fong
Panel Collection Name: PalmTheory™
Dimensions: 24”x24”x34” or 609.6mm x 609.6mm x 863.6mm
Material: Plyboo RealCore bamboo
Fire Rating: Class C or Class B
Geometry: Isosceles Triangles
Download: CSI 3-part specification

General Guidelines for Installation of PalmTheory™ Panels
Using Mechanical Fasteners
PalmTheory™ panels by Smith & Fong Co. are triangular shaped carved panels intended for quick installation with minimal use of tools. While PalmTheory™ panels can be installed using any number of installation methods, in this document we discuss an installation using permanent bonding tape coupled with trim-head screws.
Installers should note that the ultimate installation methodology used will vary from project to project, depending on various job-site parameters and contract requirements. As such, we ask that you carefully review your installation requirements to assure that the discrete installation methods utilized are appropriate for each installation. Depending on your particular job requirements, other installation methods may be more appropriate.
Wall preparation:
All wall surfaces should be clean and smooth, with sheathing consisting of at least ½” - ¾” (or thicker, depending on installation requirements) CDX-rated or better plywood. Please make sure the plywood sheathing panels are evenly and securely screwed to the wall studs or wall blocking, that the sheathing is flat and straight on the wall, and contours the installation area for the PalmTheory™ panels as appropriate. Since the PalmTheory™ panels will be applied to the sheathing surface, any deflection in the sheathing will result in commensurate deflections in the PalmTheory™ panel layer.
How to Build your PalmTheory™ Wall:
Using the PalmTheory™ design tool elevations or architectural elevations as provided, assemble the first PalmTheory™ panel starting at the upper left corner of your installation area on the wall. Make sure that the each and every PalmTheory™ panel installed is properly oriented as required by the overall wall pattern intended.
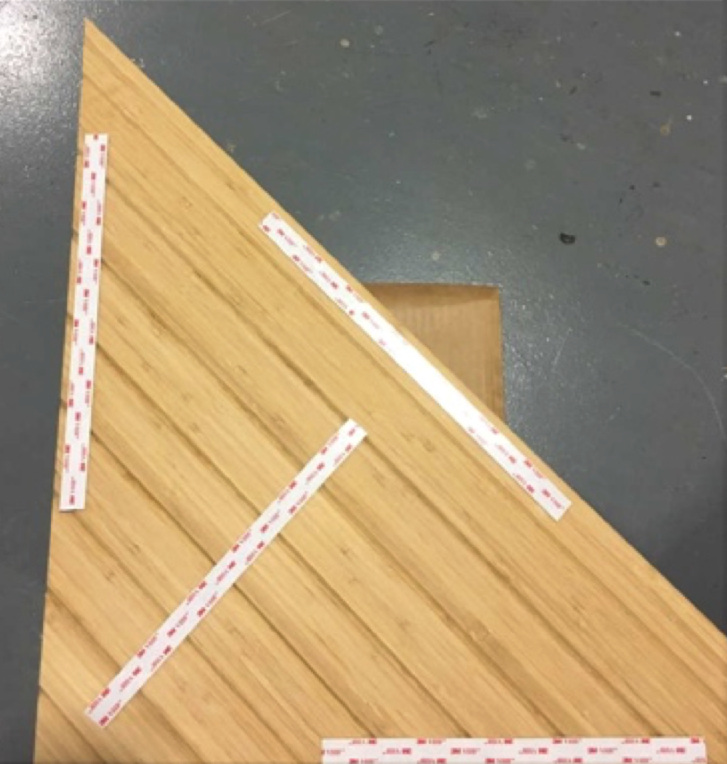
We recommend the use of at least very high bonding (VHB) double-side tape applied to the outer back edges of the A, B, C or D panels as required by the installation plans. Please note the direction of each triangle in grid elevations in order to achieve the intended design pattern. Starting on the upper left corner apply at least 4 pieces of VHB tape per PalmTheory™ panel (see picture) before placing the PalmTheory™ panel on sheathing, starting from the top and working downwards two or more rows at a time
Please carefully note: The initial placement of the PalmTheory™ panels must be carefully performed to make sure all panels are square to a snap line, your wall, or the sheathing edge line, as appropriate. All subsequent PalmTheory™ panels will be installed to the right of this line, so it is of utmost importance that the initial panel be square and straight in its initial application.
Please take a moment to look at the face pattern of the installed PalmTheory™ panel to verify that the pattern is properly aligned with respect to the neighboring PalmTheory™ panels, and that the overall pattern intended in being achieved, before pressing firmly and setting the panel in place.

After a few PalmTheory™ triangular panels have been installed, and you have taken appropriate steps to make sure the overall pattern intended is being followed, with seamless transitions between the panels and the installed panels being square and level, then you can secure each panel in place using mechanical fasteners. We recommend the use of at least 2-3 screws to secure a PalmTheory™ panel, typically using 1�” GRK trim head screws or better (see picture), as appropriate for your installation. Repeat this process, completing the full wall panel installation a few sections at a time. Please note that VHB tape is somewhat flexible, and if you act quickly, PalmTheory™ panels can be moved for a tighter fit prior to screws being applied.
Where available, mechanical fasteners should be applied in tones matching the PalmTheory™ panels in order to better conceal the fasteners. For example, gold tone screws may be used to match Amber panels, or black tone screws to match Noir finishes. Fasteners may also be spray painted to match the color of the PalmTheory™ panels, matching our Gray, Mist or Fog finishing by applying spray paint to the screws prior to installation. For further concealment of mechanical fasteners, please consider applying screws close to the hard-raised lines of each PalmTheory™ panel, hence nesting the screws in the shadowed edge of the valleys cut into each panel. The trim head screws are self-tapping and should typically sink below the panel face without being countersunk.
You can repeat this process until the full wall paneling installation is compete. We recommend that you carefully monitor the progress of your installation, working a small section at a time to make sure that your panels are evenly aligned to the wall, properly arranged to achieve the overall pattern, and securely fastened for a uniform installation achieving uniform transitions between the PalmTheory™ panels.
Odd Shaped Walls:
Due to variances in walls, including for the shape of the area where PalmTheory™ panels are to be installed, it may necessary to cut or trim panels to shape prior to installation. To minimize the appearance of such trimmed panels, we recommend placing these cuts at the bottom of the last row of the PalmTheory™ panel installation. To achieve a clean cut, please use 80-tooth or better carbide blades. A table saw or other similar device that can accommodate a 2ft triangular panel should be used. For best results, please take care to cut slowly and carefully, particularly on angle and cross-cut pieces.
Please feel free to contact us if you have any questions.